Tuesday, December 2, 2014

Premier Hi-fi COB snare (1967-1970): The Odyssey

Some of you know the buzz of excitement when you find
Hi-fi: The drum that got me going...
an interesting drum for sale. You smell a potential score that will fill a hole in your collection, and you start to tingle. You check a few photos, ask a few questions, and you turn to the Holy Drum Geek Triumvirate for answers: Friends, Facebook, and Forums. And then you jump.

In this post I'll share what I've learned about late-60's Premier metal snares. Some of this stuff I knew, but most of it I learned while trying to figure out exactly what I had bought without having ever seen it in person!

Feel free to comment or send me a note if you know more about anything I claim here or anywhere on this blog!


What makes a Hi-fi a Hi-fi?

In case you're new to Premier snares, the Hi-Fi is a late 60's addition to the Premier line. It came in wood and metal (see below) with a standard strainer (called a 632, I believe), as opposed to the more common parallel strainer offered on most other Premier snares at the time (like the earlier Royal Ace or the Hi-fi's contemporary, the 2000).

Metal is metal is metal

1969 Catalog Page
In this post I'll only look at the metal version of the Hi-fi. (For info on birch v. mahogany, check my Beverley article.) Take a look at most pre-1970s Premier catalogs and you'll find that their metal snares were made of... well... metal. What kind of metal? That's another story. Metal is metal, right? At least it was in the good old days!

Here's a page from the 1969 Premier catalog. Notice that the lower Hi-fi is made of... Metal. (Insert smiley here). And look a bit lower down this blog post at the 1972 catalog. By 1972, clearly the Hi-fi has changed, but it's still made of... you guessed it: Metal.

I scoured lots of sites and the Premier experts seem to agree that the metal for most pre-1968 Premier snares was brass. But once we get past 1968 or so (during the transition from Pre-International to International size shells) you also find lots of references to aluminium Premier snares. That is, pretty soon after introducing "metal" Hi-Fi's, Premier switched from brass to aluminium as their metal of choice. Why change? I hate to be cynical, but based on what I've read about the history of Premier (and all other major drum brands from those days) it must have been a cost saving measure. 

1972 Catalog Page

What about the badge? Dating?

So like I mentioned, you can tell a Hi-fi by the strainer. That's the easy part. But what year is my Hi-fi? Is it an earlier brass drum, or maybe a later aluminium?

With Premier, badges can tell a lot, but not everything. For example, look at the 1969 catalog above. Notice that there are two different badges on the same page. The wooden drum has the newer badge, while the metal drum has the older badge. Hmm... in fact, even in the 1972 catalog we see the same "different badge" effect, but this time with the wood and metal switched.  

Either way, for my purposes it was clear that my drum must be from somewhere after 1967 or so when this "new badge" was introduced (even if nobody told the folks who made the catalogs for Premier).

Most confirmed brass Hi-fi's seem to have come with the older badge and often had the Hi-fi name on the badge, so at first I suspected my drum was a later 1970's model, and likely aluminium. I felt better when I learned that the "new badge" came without a serial number until 1970. Assuming that's the case, it seemed safe to assume that my drum is from 1967-1970. (Side note: Serial numbers at Premier don't help with dating since they were only provided to allow you to track your assets for insurance purposes.)

(Also note that I'm focusing on a very short period here from 1967 into the early 70's... I won't discuss earlier or later Premier badges.)

Lugs and Beer Barrels 

Some examples of  Premier die-cast hoops 
Obviously my drum had 10 lugs. Since later Hi-Fi's were often 8-lug, I considered this encouraging.

Next I noticed that my snare has a tighter, rounder style die-cast hoop, which I learned is called Beer Barrel. It was the standard Premier hoop in the 60's and before (feel free to add detail in the comments below). After that, perhaps by 1972 or so, the design changed slightly to what many call Streamline hoops. All veteran Premier-watchers know this like they know mahogany from birch, but it's something I had never noticed. Maybe you had never noticed either? Maybe you care? :-)

Anyway, this little piece of Beer Barrel evidence got me excited. From what I know about Premier (and Rogers and others), after a major transition they would use whatever old components they had on hand (shells, badges, labels, lugs, hoops, etc) until they were gone. So I was thinking that I must have old hoops with a new badge.

The hoops, by the way, are non-magnetic. If you can believe what you read, they are made of mazak, part of a family of alloys with a base metal of zinc and alloying elements of aluminium, magnesium, and copper (thanks, wikipedia). 

And the shell?

I bought the drum based on this photo and  a few more
So back to the shell. As you can see, my drum shows a few scratches, but no pitting. Seasoned snare collectors know that it's rare to find an older chromed aluminium snare that doesn't show at least some pitting. Even my very pristine Cosmic 21 shows some very minor pitting. This drum (my Hi-fi) showed no evidence of the usual aluminium pitting.  And following the logic of "old hoop, new badge" I ended up thinking I must have old hoops, new badge, old shell. That is, I must have a "leftover" brass shell, or simply from the days before they introduced aluminium.

And the sound?

So finally the drum arrived! At first I was concerned because a household magnet gave the ever-so-slightest resistance. Barely noticeable, but confirmed by my friend as something real. Nonetheless, folks in my community (Friends and Facebook) confirmed that a magnet sticks to steel like it sticks to your fridge, and that I shouldn't worry about la resistance. I also read that chrome plating can also cause minimal pull.

When I finally played the drum (with original Everyplay heads top and bottom), it became quite evident that it's indeed brass, as most of the Facebook Premier guys had told me it would be. It has "that" brass sound -- quite round with a nice "donk" to go along with just enough crispiness. I'll try to post a sample as soon as possible, but the current video on YouTube of an earlier Hi-Fi brass (not mine) gives you the idea (posted below).
One tidbit of info I am missing: I'm thinking there must have been a change in tone control that helps folks date their Premier drums? I can't find any details, so if you have some info, please comment or drop me a note. 

The Cleanup

All cleaned up
I took the drum apart, probably for the first time in its lifetime. The drum was very well cared for, and only one slotted tension rod and insert showed some rust. The lugs are nearly perfect, with one or two scratches here and there on a few lugs. It weighs in at 1952 grams with lugs, strainer, and butt attached. Each lug is 61 grams, so stripped to strainer and butt it's about 1300 grams. There is one ding on the bottom edge and the badge has what we might call a tear. But for a 45 year old piece of equipment, I'd say it's looking fine. I can also mention that there's a very smooth weld. Nicely done. Superior to the weld on my ~2010 George Way (Dunnet) Bronze snare.


Not my video, but gets the idea across very well!


Monday, October 21, 2013

Premier Series Classic, Elite: Bullet Review

In October 2013 I picked up a fine Premier kit from the UK. Here's what I got:
  • Premier Series Elite, Maple, 12x9 and 16x16 toms
  • Premier Series Classic, Maple, 22x18 kick drum
  • Update - Summer 2014: I added a 10x8 Maple Elite 
Update: January 2015
I love these drums more and more each time I play them! They are the only drums I've played that can actually make a set of Evans Hydraulic sound explosive instead of dead.

Now read on to see my original analysis and impressions....

Finish
  • Lovely black sparkle with no flaws detected 
  • Compared to the finish on the Natal I recently owned, this is superior
  • In short, top-flight professional finish

Shells
  • Thin maple shells - not reinforced
  • Everything seems very round
  • The toms have perfect edges
  • Internal lacquer in order
  • Very minor rough spot on the inside of the kick at the tom mount (where they drilled the hole for the tom mount)

Hoops/Rims
  • The ultra-classy die-cast hoops on the Elite toms are my favorite thing about this kit
  • They are elegant, tasteful, not too bulky
  • Really lovely with their rounded lines, matching well with the oval Classic/Elite lugs
  • The kick drum hoops were fine, flawless
  • They are low-profile, which means you can position somewhat lower that with standard hoops
  • Also, if you are sloppy, the low-profile hoops help prevent mistaken rim shots ;-)

Rods, lugs
  • Standard rods; all were straight (which is not always such an easy achievement -- for example, on my Natal a few rods were a bit off)
  • The design of the oval lugs is a matter of personal taste. I like 'em!
  • One unique feature of these lugs is the "nyloc inserts" that are intended to prevent de-tuning. The inserts create a tighter feel when you screw in a rod. This makes a head change slightly more effort, in particular on the kick. I can't finger-tighten the kick rods as a result. 
Update: July 17, 2015: While playing a song in which I ride the rims pretty hard, three of the six lugs de-tune completely. It's safe to say the Nyloc inserts are pretty useless. Sorry to say.
  • The kick claws are another favorite of mine. Check the design. Quite lovely.

Spurs
  • The kick spurs are solid, they were squeaky and stiff on arrival, but a little silicon spray solved that 
  • Originally I said "Not the smoothest gear I've seen on a high-end kit" but now that I've had it longer, I need to say this is a solid kit.
  • For example, I also picked up a Yamaha Club Custom. While it is a different beast altogether, it feels very light in comparison. For a tour, I'd choose the Series kit. Solid gear.

Sound
  • First off, let me say I tune with the assistance of a Tune-Bot
  • With Ambassador X heads and stock Ambassador Clear reso I had trouble controlling head ring. That is, regardless of the tuning I always ended up with a very long resonant sound with a musical ring. This is not a problem in itself. In fact, it could be considered a great thing, as you probably know!
  • HEAD COMBO UPDATE. Ambassador X top with Coated Ambassador bottom gave musical and pleasant tone at a relatively high tuning. I lost some of the explosiveness I had with the Clear Vintage Emperor, but the drums really sing now in a nice way. I chalk it up to the coated reso as a natural pair for the Ambassador X.
  • When I switched to Clear Vintage Emperor, I found that this exceptional resonance became a huge asset. The drums became explosive, with a lovely low frequency musical tone. On other drums I've found Clear Vintage Emperor too dead for my taste. But they are truly wonderful on these Elite toms. It seems to be a great combination for a deep, explosive rock sound that is still lively and resonant. 
  • The Clear Vintage Emperors also work well tuned up a bit to around a 2A. They lose a little of that "feel it in your guts" feeling, but give a more musical tone for pop or jazz.
  • I really look forward to experimenting with other heads! My theory is that the 3mm undersizing of the shells helps exaggerate the sound and resonance of the head. 
  • Maybe we can say that these drums favor "Head resonance" over "shell resonance"?
  • For example, for rehearsals I put on some Evans Hydraulic Glass that I had on hand. On these drums, even the Hydraulic heads sing! I was amazed, but it's true. On my Yamaha Club Customs the hydraulics went THUD, but on the Series kit they actually ring out with a nice mellow note.
  • So far my impression is that these drums have less of that "typical modern Maple drums" sound. Again, I think it has to do with the undersizing and extra "head resonance" over "shell resonance"?
  • My impression is that I'm getting more attack and highs than I had with my Natal Maple. I reserve the right to add details here!
  • On my Pearl MHX I found the die-cast "MasterCast" hoops deadened the sound, but these Premier die-cast hoops don't seem to have the same impact. I think they are simply lighter? Certainly they are prettier!

Tom mount
  • Luckily I have a single tom mount since the double tom mount I've seen in photos is bulky and unattractive to me and some of my friends
  • It's a standard old-school ball mount: solid and reliable
  • The flush suspension system is elegant, but I admit I prefer solutions that don't mount through the tuning rods. This makes head change annoying. But the aesthetics are in order.
  • With the flush mount, I was getting some buzz from the suspension mount making contact somewhere. It's the only problem I've had with these drums.
  • Also, the metal on the suspension system is not filed very well. It sits very close to the drum, so the slightly rough edge could scratch the finish. I put a little electric tape on the rough edge just to be sure.
  • Overall it seems the flush ISO suspension mount is the Achilles' Heal of these drums
  • UPDATE September 2014. The excellent folks at Premier in the UK provided "British Collection" ISO mounts for my Elite toms. These work better with the die-cast hoops. While I still dislike "through the rod" solutions, the toms are floating nicely and all buzzing is long-gone
  • TIP: If you pick up one of these kits with die-cast hoops, consider getting "British Collection" mounts. 
Elite with "British Collection" ISO mount
Overall build
  • To me, this feels like any other solid modern Pro-level kit 
  • High-end for sure, but this does not feel like an ultra high-end kit 
  • Pardon the car analogy, but I'd call this a solid Honda or Mazda or even an Audi, not a Bentley (that's a complement, I think). 
  • (Premier does have a "Bentley" line (One series, or their new Modern Classic) but they are in another price category.)
  • If you can get one for a solid price, you will be happy
  • Great modern drums if you get them for the right price (since the list prices I see on Amazon and many sites make no sense at all)

What's the difference between Classic and Elite?
Classic and Elite = Same shells
  • As far as I can tell, nothing except the badge and the die-cast rims on the toms. 
  • The finish is absolutely the same. 
  • Based on my reading of Premier marketing material and other sites, Classic came only in shell packs in limited finishes. My kick was an orphan who is now happy with its Elite brothers.

Tuesday, October 8, 2013

Natal Maple Drums: Bullet Review After One Year


For a little more than a year I was the proud owner of a Natal Maple US Fusion X. This was the first Natal kit sold in Hungary, so I had no idea what to expect when it arrived. I was not disappointed.

Recently I decided to sell my Natal to a friend. But that does mean I don't love it. It really is a fine kit. If you see one for the right price and you need a modern kit, do not hesitate to consider it!!! Natal's pro kits are as good as anything I've seen from the production lines of Asia, Europe, or the Americas.


Lots of big tom runs in this track. Really a good example of the lively sound I was getting.


Sizes 
Short stack sizes, as follows:
  • 10 x 6.5" 
  • 12 x 7" 
  • 16 x 14" 
  • 22 x 18"

 Wood and shells
  • Maple, nice and thin, and smooooth
  • Fantastic edges coated with thin wax to make a nice bond with the skin
  • Flawless -- Natal quality control seems to be working
Sound, tuning
  • Lively, resonant, with a full, round tone
  • Tons of attack thanks to the 45 degree bearing edges
  • They tune up in a flash, and hold their tuning very well thanks to special nylon-dipped tuning rods 
  • Very sensitive to smallest turns of the key
Lugs
Some friends really disliked the large round lugs, each emblazoned with a big Aztec-style sun. I kinda like them, but I admit they are a bit extreme.  I recently saw the new Natal Spirit mid-level kit and actually prefer the Spirit's smaller lug.  Still, they are well-made and do the job well. All lugs are well insulated with rubber gaskets, as you would expect these days.

Tom mount
The tom mount is probably my favorite part of the Natal solution. They really nailed an elegant mount, with the "RIMS-like" suspension system attached to two of the lugs.

Finish
The White Metallic lacquer finish was nice, but not amazing. I also saw a Silver Sparkle kit recently and also found it less-than overwhelming. The natural finishes I've seen are more impressive. For example, the Natal Bubinga with a natural finish is truly lovely (much more so in person than in photos).  I should note that the Natal Spirit kit I saw also had a fantastic vintage natural finish. For a mid-level kit, it impressed me as much as any of the natural Yamaha Absolute finishes I've seen!


(This is an updated version of an older post about my Natal kit, originally published in June 2012)


Thursday, July 18, 2013

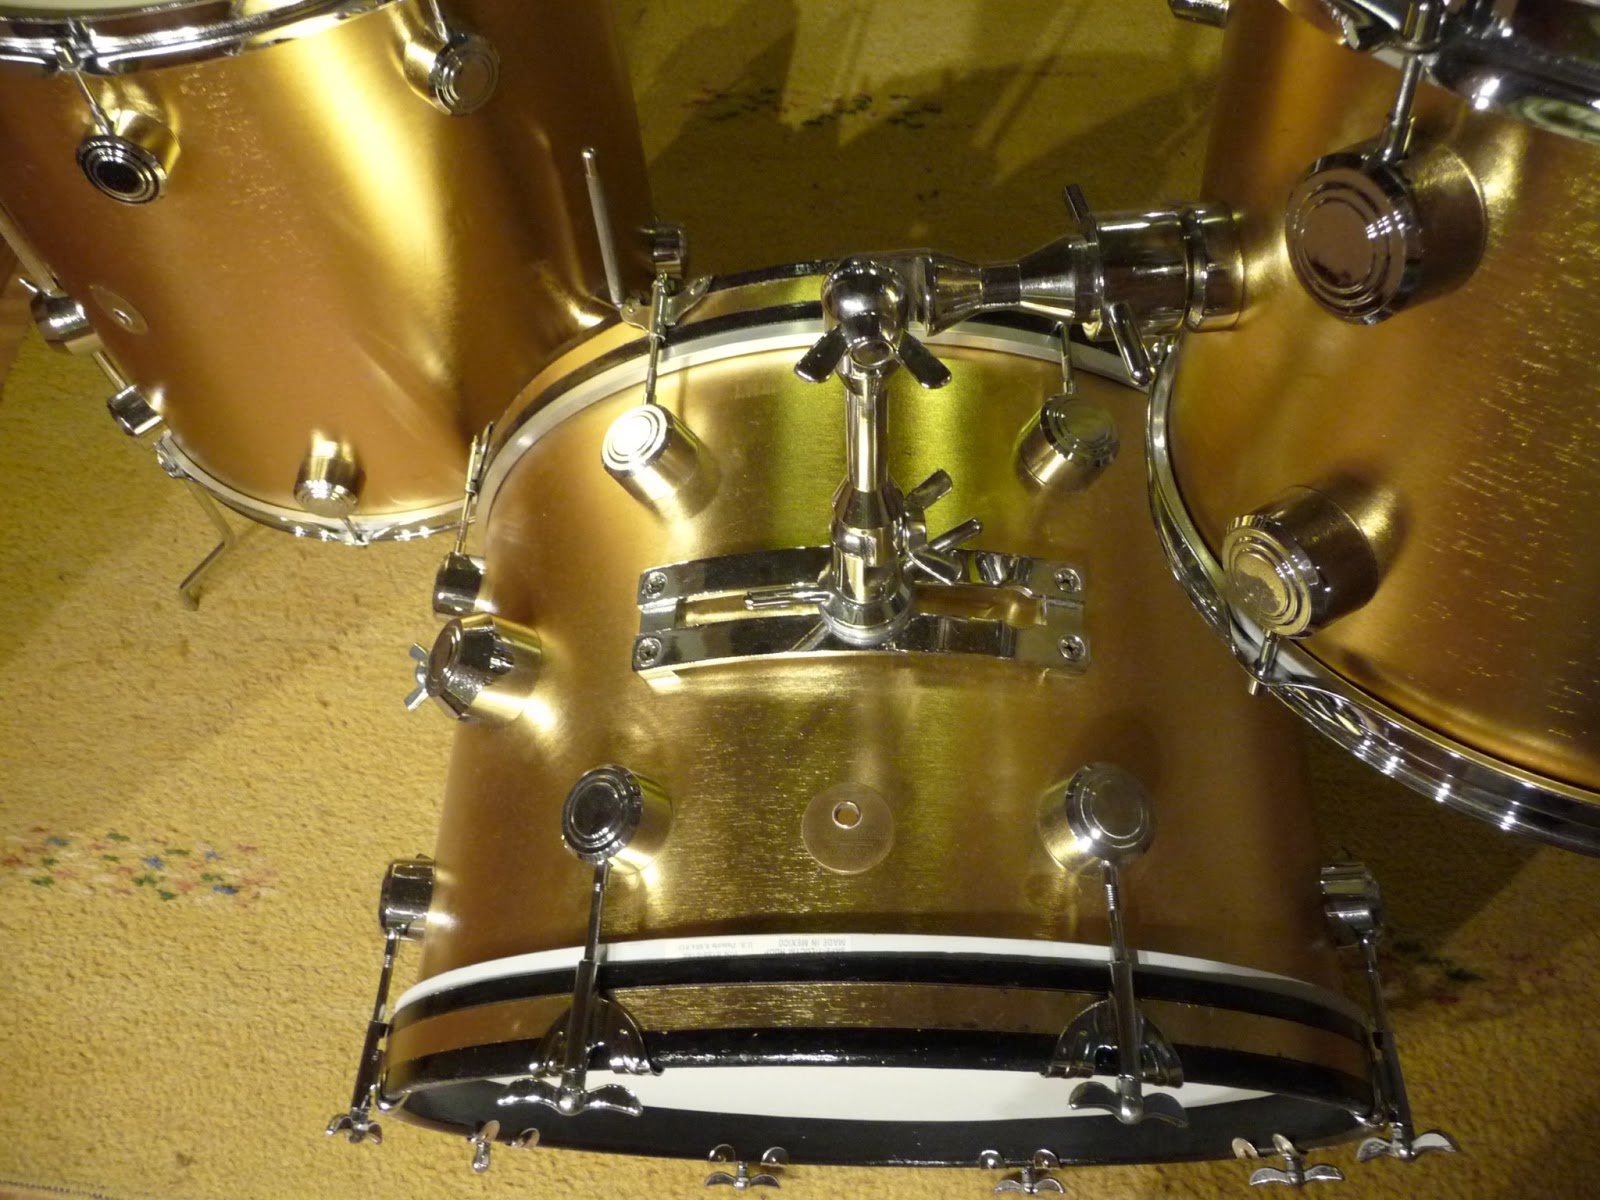
Hayman Vibrasonic 2221 Pacemaker in Gold Ingot

A few months ago I took delivery of a Hayman Vibrasonic kit in Gold Ingot. Three pieces: 13-16-20.

My research tells me it's a 2221 Pacemaker (sans snare) with a 20 x 13 kick (yes, 13", with 8 lugs) and a Hayman brass badge (not George Hayman), dating it to 1969-1973.

It needed some work and was missing some parts, but I've polished up the chrome and badges, painted the hoops, and bought some missing bits. I'm not claiming to be an expert, but here are my thoughts on Hayman drums after taking this kit apart and making it nice again.


Shells
  • The shells appear to be birch and are among the thinnest I've seen. 
  • The Vibrasonic coating on the floor and kick are crazed, but not the 13.
  • The kit has no extra holes anywhere, with original baseball bat dampeners. 
  • In some places the lugs have worn into the outer ply a bit, but it doesn't seem to have caused any problem. I considered adding rubber gaskets between lug and drum, but had trouble finding any that would fit. 
  • The floor tom had some splitting at the bottom reinforcement ring. As most of you probably know, it's not a big job to glue a re-ring, so it was easy to fix.  
  • The toms are slightly over-sized, but not out of round. Some standard heads go on the toms, but Aquarian American Vintage have proved to be the best solution for ease of tuning.
  • UPDATE: I bought some Evans Level 360 G1 heads and they went on easily and tuned up in a flash. I'm thrilled since now I have some flexibility choosing heads.
  • The badge is slightly loose on the 13"
  • I polished the brass badges for many, many minutes each with automotive chrome polish
Regarding crazing, I got some nice info from a UK drum builder who asked to remain nameless. Here's what he told me in an email:
The paint Hayman used to use is a thick polyurethane and sets very hard like cement. 8 out of 10 Hayman drums do crack inside as the paint does not move with the shell (it was a stupid idea -- I told Ivor Arbiter at the time). If I was you i would just live with it. These are great old drums. 

Wrap
  • The gold ingot wrap is looking fine for its age. A few scuffs here and there, but nothing deep, and no splitting. 
  • It's a high quality wrap, I'd say. It has indeed held up to the test of time. Interesting that some folks on Vintage Drum Forum commented that Hayman wraps don't hold up. This one really looks great, as these unedited photos will show. 
  • First I washed them with unscented soap and water with a cotton t-shirt, and then I polished them using Turtle Wax dashboard cleaner.

Hoops and rims
  • Kick: I had to sand and repaint the original kick drum hoops and glue the gold ingot inlay in a few places. I used standard glossy black paint from the hardware store. Nothing fancy, and I know I'd get a better finish with spray paint or an air gun. Maybe I'll get around to that later. 
  • The kit came with original rims for the 13 and 16, so I have non-original replacements (Gibraltar) for the reso side. Hayman toms are standard sizes (if slightly oversized), so any rims will do.
  • The Hayman rims are solid and similar in weight to modern Gibraltar. Certainly a stronger build than Beverley rims from the same era.
  • I cleaned the original rims with vinegar and aluminum foil. It really melted away the rust. 

Tension Rods, Lugs
Probably the strangest thing about the Hayman Vibrasonic is the tension rods.
2221 Pacemaker - Thumbs up!
  • Hayman rods are slotted, like most vintage UK drums, but smaller gauge (smaller around) than other rods out there. The kit only came with top heads, so I was missing some rods and few swivel nuts. I had to buy original replacement rods and a few nuts from the UK at somewhat of a premium. I found this easier than swapping out for modern-size swivel nuts and rods. Also, I wanted to try to keep the kit as original as possible. 
  • I only had eight original kick rods and claws, so I used modern replacements (Cannon). That was easy enough since the kick swivel nuts are standard size. Go figure. 
  • The lugs are a bit scraped with some pitting. I cleaned them up with vinegar and aluminum foil and got them into pretty good shape.  
  • Hayman lugs/inserts are the old spring-loaded kind. I decided to pack a piece of foam in each lug to prevent noises (like used in cheap mattresses or furniture). I'm not in love with the spring since the nut has a tendency to push down when you don't expect it to. But it's not really a big issue.

Spurs
With custom logo and Pearl suspension feet on Danmar Ludwig spurs
The kit did not come with kick spurs, so I ordered 9.5mm Danmar Ludwig replacement spurs. They are actually a tiny bit short for the Hayman, so I extended them using Pearl suspension feet. Solid as a rock now, with a little help from a Gibraltar kick anchor just to be sure.


The Knuckle Cruncher 
Some call it the Knuckle Buster, some the Knuckle Cruncher. But indeed, now I see why the infamous Hayman tom holder has such a bad reputation. As others have described, it's a strange device with "a mass of joints, thumbscrews and ring screws mounted on a consolette-style rail."  It looks great, but it is indeed a pain in the butt and doesn't allow much flexibility in positioning.  I'm glad I have one since it adds some value to the kit. But I gotta say, it's not the easiest beast to use.

Sound - VERY Quick Demo
Here is a very quick demo made in the living room of my apartment at low volume - out of consideration for the neighbors. Recorded with a single Audio-Technica ATR 25 stereo mic with a Canon HD10 camera. While the video is short, it demonstrates the nice warm tone you get with the American Vintage heads.


Dating the kit
I'm no expert by any means, but evidence I've collected from various sources online suggests that my kit is from 1969, and likely a transitional kit from George Hayman to simply Hayman.

Later Hayman kick claw/rod
Early Hayman kick claw/rod
For example, it seems Hayman kick drum claws and tension rods looked like this (left) in the early days. Then later they switched to a more modern Z-shape (right). An expert has told me that the claws on the left were on George Hayman kits. But mine is certainly simply a Hayman (no George on the badges).

The Hayman (no George) brass badge patent numbers clearly say 1968 and 1969.  According to wikipedia, "each round badge on a Hayman drum has a patent number - giving the year of manufacture within the patent number."

(claw photos from eBay, thanks to Pete's Drum World)

Another piece of evidence putting my kit to the first years of Hayman drums is shell crazing. It seems earlier Hayman kits tend to craze more than later, and mine is rather crazed (the floor tom most of all, but also the kick). Allegedly it took them time to perfect the paint.


History of the kit
All I know is that it arrived from Glasgow via a nice guy named Davy who used to play with a Glaswegian outfit called Baby Chaos.  You can see Davy on the exact same kit on a few of their tracks on YouTube.
Here are some shots from before the clean-up. Luckily that sticker came off the kick with ease.


Tuesday, June 18, 2013

Wednesday, April 10, 2013

Video: Pearl MHX and Ludwig Classic Maple

I managed to make some decent demo videos of my 2004 Pearl MHX (now owned by my friend) and my other friend's Ludwig Classic Maple (early 2000s).

Both were recorded with a single Audio-Technica ATR 25 stereo mic with a Canon HD10 camera. I always do a little Bo Diddley thing for these demos. That way you can focus on the drums, not the cymbals (or my playing)!

Regarding the snares used, here's a good chance to compare the much less expensive Pearl Sensitone Elite Aluminum with the famous Ludalloy Supraphonic.  Honestly, if you just need a solid player's aluminum drum and don't care about resale value, consider the Pearl. Or try to hunt down an old Beverley Cosmic 21.

We tuned the Pearl MHX nice and low to bring out the characteristics of these drums: big and fat.  We used the High Resonance relationship described in the Tune Bot Tuning Guide (bottom head slightly higher, but not too much). The tom hoops are Pearl die-cast.
  • 13x9 with Ambassador X, tuned to a G with Tune Bot
  • 16x16 with Ambassador X, tuned to a C with Tune Bot
  • 22x18 with Powerstroke 3
  • Pearl Sensitone Elite Aluminum 6.5" (SuperHoops) with Ambassador X14 tuned to F# with Tune Bot


My friend with the Ludwig puts moon gel on all heads, even the resonant side. The snare also has some. I wanted to demonstrate my friend's preferred sound. I wouldn't tune this way, but he does a great job and drums sound superb. His bottom head is quite a bit higher than the top. If we use the terms described in the Tune Bot Tuning Guide, he's at what they call Medium Resonance.
  • 13x9 with Ambassador top and bottom, tuned manually to an A
  • 16x16 with Emperor top, Ambassador (Ludwig) bottom, tuned manually to a D
  • 22x16 with Powerstroke 3
  • Ludwig Supraphonic Ludalloy 6.5" with Ambassador tuned manually.


Thursday, January 31, 2013

Mr Anonymous with tips for "stagnant" drummers

My old friend Jeep "Mr Anonymous" MacNichol (formerly of The Samples) has put together a great list of tips for drummers who feel stagnant.

I can totally relate to this one in particular. My breakthrough period as a drummer came when I learned to crank the metronome down to around 60 and suffer until I learned to find the groove at slow tempos.

#4 START SLOW…any new technique you decide to learn, start PAINFULLY slow to the point where it doesn’t even feel like a drum beat or rhythm….there is always a tendency to want to play something fast instantly but FORCE yourself to play SLOW SLOW SLOW until it feels automatic like breathing. Every musician or martial artist or athlete started at the same place as you(the beginning) and they all started just as slow as you….so relax and enjoy this part because you’re only at the beginning once. 
Here's the rest of the article. Good stuff.
http://www.mranonymous.net/musicblog/5-tips-for-drummers-by-mr-anonymous/