A few months ago I took delivery of a
Hayman Vibrasonic kit in Gold Ingot. Three pieces: 13-16-20.
My research tells me it's a
2221 Pacemaker (sans snare) with a 20 x 13 kick (yes,
13", with 8 lugs) and a Hayman brass badge (not George Hayman), dating it to 1969-1973.
It needed some work and was missing some parts, but I've polished up the chrome and badges, painted the hoops, and bought some missing bits. I'm not claiming to be an expert, but here are my thoughts on Hayman drums after taking this kit apart and making it nice again.
Shells

- The shells appear to be birch and are among the thinnest I've seen.
- The Vibrasonic coating on the floor and kick are crazed, but not the 13.
- The kit has no extra holes anywhere, with original baseball bat dampeners.
- In some places the lugs have worn into the outer ply a bit, but it doesn't seem to have caused any problem. I considered adding rubber gaskets between lug and drum, but had trouble finding any that would fit.
- The floor tom had some splitting at the bottom reinforcement ring. As most of you probably know, it's not a big job to glue a re-ring, so it was easy to fix.
- The toms are slightly over-sized, but not out of round. Some standard heads go on the toms, but Aquarian American Vintage have proved to be the best solution for ease of tuning.
- UPDATE: I bought some Evans Level 360 G1 heads and they went on easily and tuned up in a flash. I'm thrilled since now I have some flexibility choosing heads.
- The badge is slightly loose on the 13"
- I polished the brass badges for many, many minutes each with automotive chrome polish
Regarding
crazing, I got some nice info from a UK drum builder who asked to remain nameless. Here's what he told me in an email:
The paint Hayman used to use is a thick polyurethane and sets very hard like cement. 8 out of 10 Hayman drums do crack inside as the paint does not move with the shell (it was a stupid idea -- I told Ivor Arbiter at the time). If I was you i would just live with it. These are great old drums.
Wrap
- The gold ingot wrap is looking fine for its age. A few scuffs here and there, but nothing deep, and no splitting.
- It's a high quality wrap, I'd say. It has indeed held up to the test of time. Interesting that some folks on Vintage Drum Forum commented that Hayman wraps don't hold up. This one really looks great, as these unedited photos will show.
- First I washed them with unscented soap and water with a cotton t-shirt, and then I polished them using Turtle Wax dashboard cleaner.
Hoops and rims

- Kick: I had to sand and repaint the original kick drum hoops and glue the gold ingot inlay in a few places. I used standard glossy black paint from the hardware store. Nothing fancy, and I know I'd get a better finish with spray paint or an air gun. Maybe I'll get around to that later.
- The kit came with original rims for the 13 and 16, so I have non-original replacements (Gibraltar) for the reso side. Hayman toms are standard sizes (if slightly oversized), so any rims will do.
- The Hayman rims are solid and similar in weight to modern Gibraltar. Certainly a stronger build than Beverley rims from the same era.
- I cleaned the original rims with vinegar and aluminum foil. It really melted away the rust.
Tension Rods, Lugs
Probably the strangest thing about the Hayman Vibrasonic is the tension rods.
 |
| 2221 Pacemaker - Thumbs up! |
- Hayman rods are slotted, like most vintage UK drums, but smaller gauge (smaller around) than other rods out there. The kit only came with top heads, so I was missing some rods and few swivel nuts. I had to buy original replacement rods and a few nuts from the UK at somewhat of a premium. I found this easier than swapping out for modern-size swivel nuts and rods. Also, I wanted to try to keep the kit as original as possible.
- I only had eight original kick rods and claws, so I used modern replacements (Cannon). That was easy enough since the kick swivel nuts are standard size. Go figure.
- The lugs are a bit scraped with some pitting. I cleaned them up with vinegar and aluminum foil and got them into pretty good shape.
- Hayman lugs/inserts are the old spring-loaded kind. I decided to pack a piece of foam in each lug to prevent noises (like used in cheap mattresses or furniture). I'm not in love with the spring since the nut has a tendency to push down when you don't expect it to. But it's not really a big issue.
Spurs
 |
| With custom logo and Pearl suspension feet on Danmar Ludwig spurs |
The kit did not come with kick spurs, so I ordered 9.5mm Danmar Ludwig replacement spurs. They are actually a tiny bit short for the Hayman, so I extended them using Pearl suspension feet. Solid as a rock now, with a little help from a Gibraltar kick anchor just to be sure.
The Knuckle Cruncher
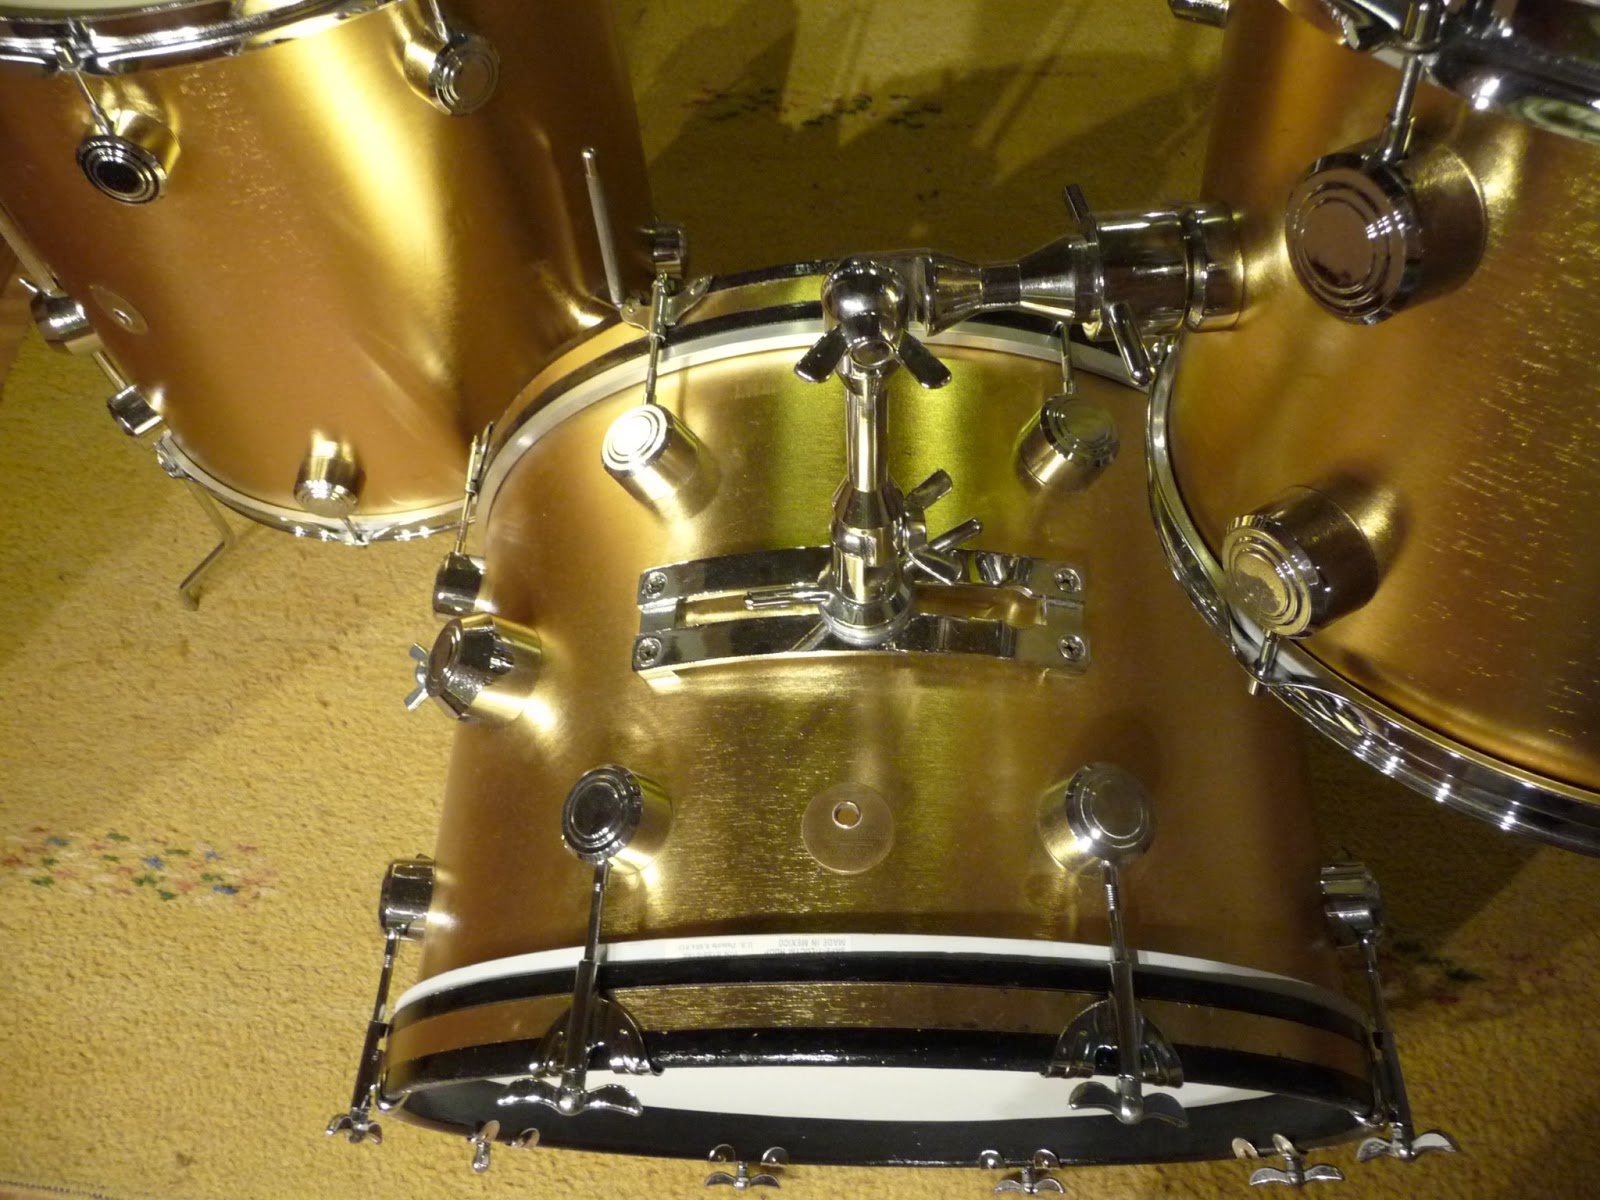
Some call it the Knuckle Buster, some the Knuckle Cruncher. But indeed, now I see why the infamous Hayman tom holder has such a bad reputation. As
others have described, it's a strange device with "a mass of joints, thumbscrews and ring screws mounted on a consolette-style rail." It looks great, but it is indeed a pain in the butt and doesn't allow much flexibility in positioning. I'm glad I have one since it adds some value to the kit. But I gotta say, it's not the easiest beast to use.
Sound - VERY Quick Demo
Here is a
very quick demo made in the living room of my apartment at low volume - out of consideration for the neighbors. Recorded with a single Audio-Technica ATR 25 stereo mic with a Canon HD10 camera. While the video is short, it demonstrates the nice warm tone you get with the American Vintage heads.
Dating the kit
I'm no expert by any means, but evidence I've collected from various sources online suggests that my kit is from 1969, and likely a transitional kit from George Hayman to simply Hayman.
 |
| Later Hayman kick claw/rod |
 |
| Early Hayman kick claw/rod |
For example, it seems Hayman kick drum claws and tension rods looked like this (left) in the early days. Then later they switched to a more modern Z-shape (right). An
expert has told me that the claws on the left were on George Hayman kits. But mine is certainly simply a Hayman (no George on the badges).
The Hayman (no George) brass badge patent numbers clearly say 1968 and 1969. According to
wikipedia, "each round badge on a Hayman drum has a patent number - giving the year of manufacture within the patent number."
(claw photos from eBay, thanks to Pete's Drum World)
Another piece of evidence putting my kit to the first years of Hayman drums is shell crazing. It seems earlier Hayman kits tend to craze more than later, and mine is rather crazed (the floor tom most of all, but also the kick). Allegedly it took them time to perfect the paint.
History of the kit
All I know is that it arrived from Glasgow via a nice guy named Davy who used to play with a Glaswegian outfit called
Baby Chaos. You can see Davy on the exact same kit on a few of their
tracks on YouTube.
Here are some shots from before the clean-up. Luckily that sticker came off the kick with ease.


 For a little more than a year I was the proud owner of a Natal Maple US Fusion X. This was the first Natal kit sold in Hungary, so I had no idea what to expect when it arrived. I was not disappointed.
 Some friends really disliked the large round lugs, each emblazoned with a big Aztec-style sun. I kinda like them, but I admit they are a bit extreme. I recently saw the new Natal Spirit mid-level kit and actually prefer the Spirit's smaller lug. Still, they are well-made and do the job well. All lugs are well insulated with rubber gaskets, as you would expect these days.


